
This is the first time this part of the Motherland goes to Düsseldorf, Germany and Rhein Con. It is going to be so much fun. I already know the location from WTC last year. It should be slightly less rusty that Conquest in January. Yet, who knows. It seems that every time I go to a major event, I'm taught new ways of playing Warmachine. So, as always I'm aiming for not being last and winning at least one match.
This is my first time at Rhein Con. It is three days of tournament play. Some of them are solo, some of them are teams. It is my first tournament since Conquest in Oslo (for coverage se here, here and here). I already know the venue and hood from WTC last year (see here and here for coverage). It is always nice to meet old and new friends, and being taught how to actually play Warmachine.
My ambitions is as always to win at least one and not come last.
I'm brining my Valerii list, which has been stable since Conquest. The second list is, at least for me the new kid on the block Zahara. I'm quite confident playing Valerii. I just need to figure out how to pick the right opponents. I have next to no idea how to pilot Zahara. This will be interesting.
| Khador - Winter Korps Kapitan Zahana Vilkul - Fog of War - Puissance - Superiority - Avalanche [15] HEAD - Hyper-Aggressive RIGHT ARM - Pneumatic Lance LEFT ARM - Wedge Shield - Great Bear [15] HEAD - Aggressive RIGHT ARM - Deep Freezer LEFT ARM - Battle Axe - Razor [18] AC-2 Bison [10] AC-2 Bison [10] Battle Mechanik [2] Sergeant Goran Lazarenko, the Jackal [2] Winter Korps Officer [3] Arkanists [4] Ths Hounds [8] Winter Korps Infantry [6] - Auto Cannon - Auto Cannon - Winter Korps Standard [1] Winter Korps Snipers [4] Command cards - Blessing of the Gods - Lucky Penny - Old Faithful - Put the Fires Out - Sapper Total Points 100/100 | Khador - Winter Korps Kommander Valerii Savaryn - Puissance - Superiority - Avalanche [15] HEAD - Hyper-Aggressive RIGHT ARM - Pneumatic Lance LEFT ARM - Wedge Shield - Avalanche [15] HEAD - Hyper-Aggressive RIGHT ARM - Pneumatic Lance LEFT ARM - Wedge Shield Kontroller [4] - Dire Wolf [10] HEAD - Shield Guard RIGHT ARM - Long Axe LEFT ARM - Plow-Shield Sergeant Sergie Krol [5] Winter Korps Officer [3] Winter Korps Officer [3] Battle Mechanik [2] Battle Mechanik [2] Arkanists [4] Man-O-War Suppressors [11] Man-O-War Suppressors [11] Man-O-War Wrecking Crew [10] Winter Korps Snipers [4] - Winter Korps Hunting Dog [1] Command cards - Blessing of the Gods - Hit & Run - Lucky Penny - Old Faithful - Sapper Total Points 100/100 |
Winter Korps under Kommander Valerii Savaryn
The Empress' best boy is leading the first list. He has been allowed to field, not one, but two of the Motherland's new toys: the Avalanches. They look so good on paper. They can trivially reach out and touch something between 14" and and 16" away. Add a bit of Kill Order and let the mayhem begin. They have, so far been a lot of fun, and a good way of keeping opponents honest. He will also field two units of Suppressors, who are just good. Although in my experience they either kill everything or nothing. There doesn't seem to be an average day in a Suppressors life.
A Wrecking Crew is also there. They are a good target for At All Cost, due to Vengeance. The Combination of Puissance and Kill Order allows them to actually Wreck stuff. Add a bit of support and a unit of snipers with a dog, and I think the infantry line is good to go.
I'm brining the Kontroller Module. So far it has been working wonders. The Kontroller brings a spray and as a 'jack Marshal with the Shatter Drive, and Dire Wolf with a Long Axe and Shield Guard seems to be the natural choice. These two BFFs can also baby sit a 50 mm objective in either Color Guard, Trench Warfare or Best Laid Plans; in particular with the support of an Officer and a Mechanik.
Winter Korps under Kapitan Zahara Vilkul
Zahara is the new kid on the block. She can reach out a touch things at ridiculous distances. Most 'casters being at the end of Zahara's charge will die. However, she might be a one trick pony. She doesn't really do a lot for her army and I suspect that the savvy opponent will be able to protect against a Vilkul Whirlwind. Let's see.
She is brining an Avalanche, because. A Great Bear with a Deep Freezer and Razor. The latter seems odd and too pricey on paper. However, there is a rumour that it over performs. I'm curious to see what it can do.
Finally, there are two Bisons for speed and board presence. The normal support from Arkanists, an Officer and a unit of Snipers. She is also bringing all the other new toys: the Jackal and the Hounds. They will also be interesting to observe on the table. Finally, inspired by my mirror match at Conquest, I'm experimenting with Infantry. So, all in all a lot of new toys that I only have a theoretical understanding of.
Battle 1 — Brineblood Marauders
My first battle is against the drunk pirate trolls. I always seem to be struggling with them. There is always a lot of Marauders, who on paper looks bad. But somehow thy manage to layer all sorts of buff and then kill my models. Also, the Lochabash Brothers are in the list. They are brand new and I haven’t seen them before.
My lovely German opponent is bringing an untraditional list — there are only three units of Marauders. How odd. It is lovely painted. As a small fun fact, he has actually done a battle report from his side of the table. It can be found here.
| Southern Kriels - Brineblood Marauders Admiral Boomhowler - SPELL - Rough Seas - SPELL - Fortify - SPELL - Fury’s Strength - Great Old One [16] - Reef Troll [8] - HEAD - Matey - BOOZE - Ale Tankard - RIGHT ARM - Ship's Gun - LEFT ARM - Boarding Axe - Vorogger [12] Booty Boss [2] Booty Boss [2] Fire Guardian [1] Fire Guardian [1] First Mate Hargor Stormjaw [4] Fugue Walker [4] Fugue Walker [4] Greygore Boomhowler [4] Madame Moriarty [3] Lochabash Brothers [9] Marauder Crew [6] - Marauder Crew Bosun [3] Marauder Crew [6] - Marauder Crew Tapper [1] Marauder Crew [6] - Marauder Crew Tapper [1] Pyg Boarding Party [6] - Pyg Coxswain [1] Command Cards - Blessing of the Gods - Break Through - Careful Reconnaissance - Defenses - Barrier - Barrier - Fire Pit - Lucky Penny Total Points 100/100 |
We are playing playing Two Fronts. This looks like a job for Valerii. The Kontroller Module can keep an eye on my 50 mm, whilst the rest of the army deals with the opponent. The two Avalanches should keep the opponent honest, if not sober. The should give the Suppressors time to deal with the medium based infantry. Let’s see how it fares.
Deployment
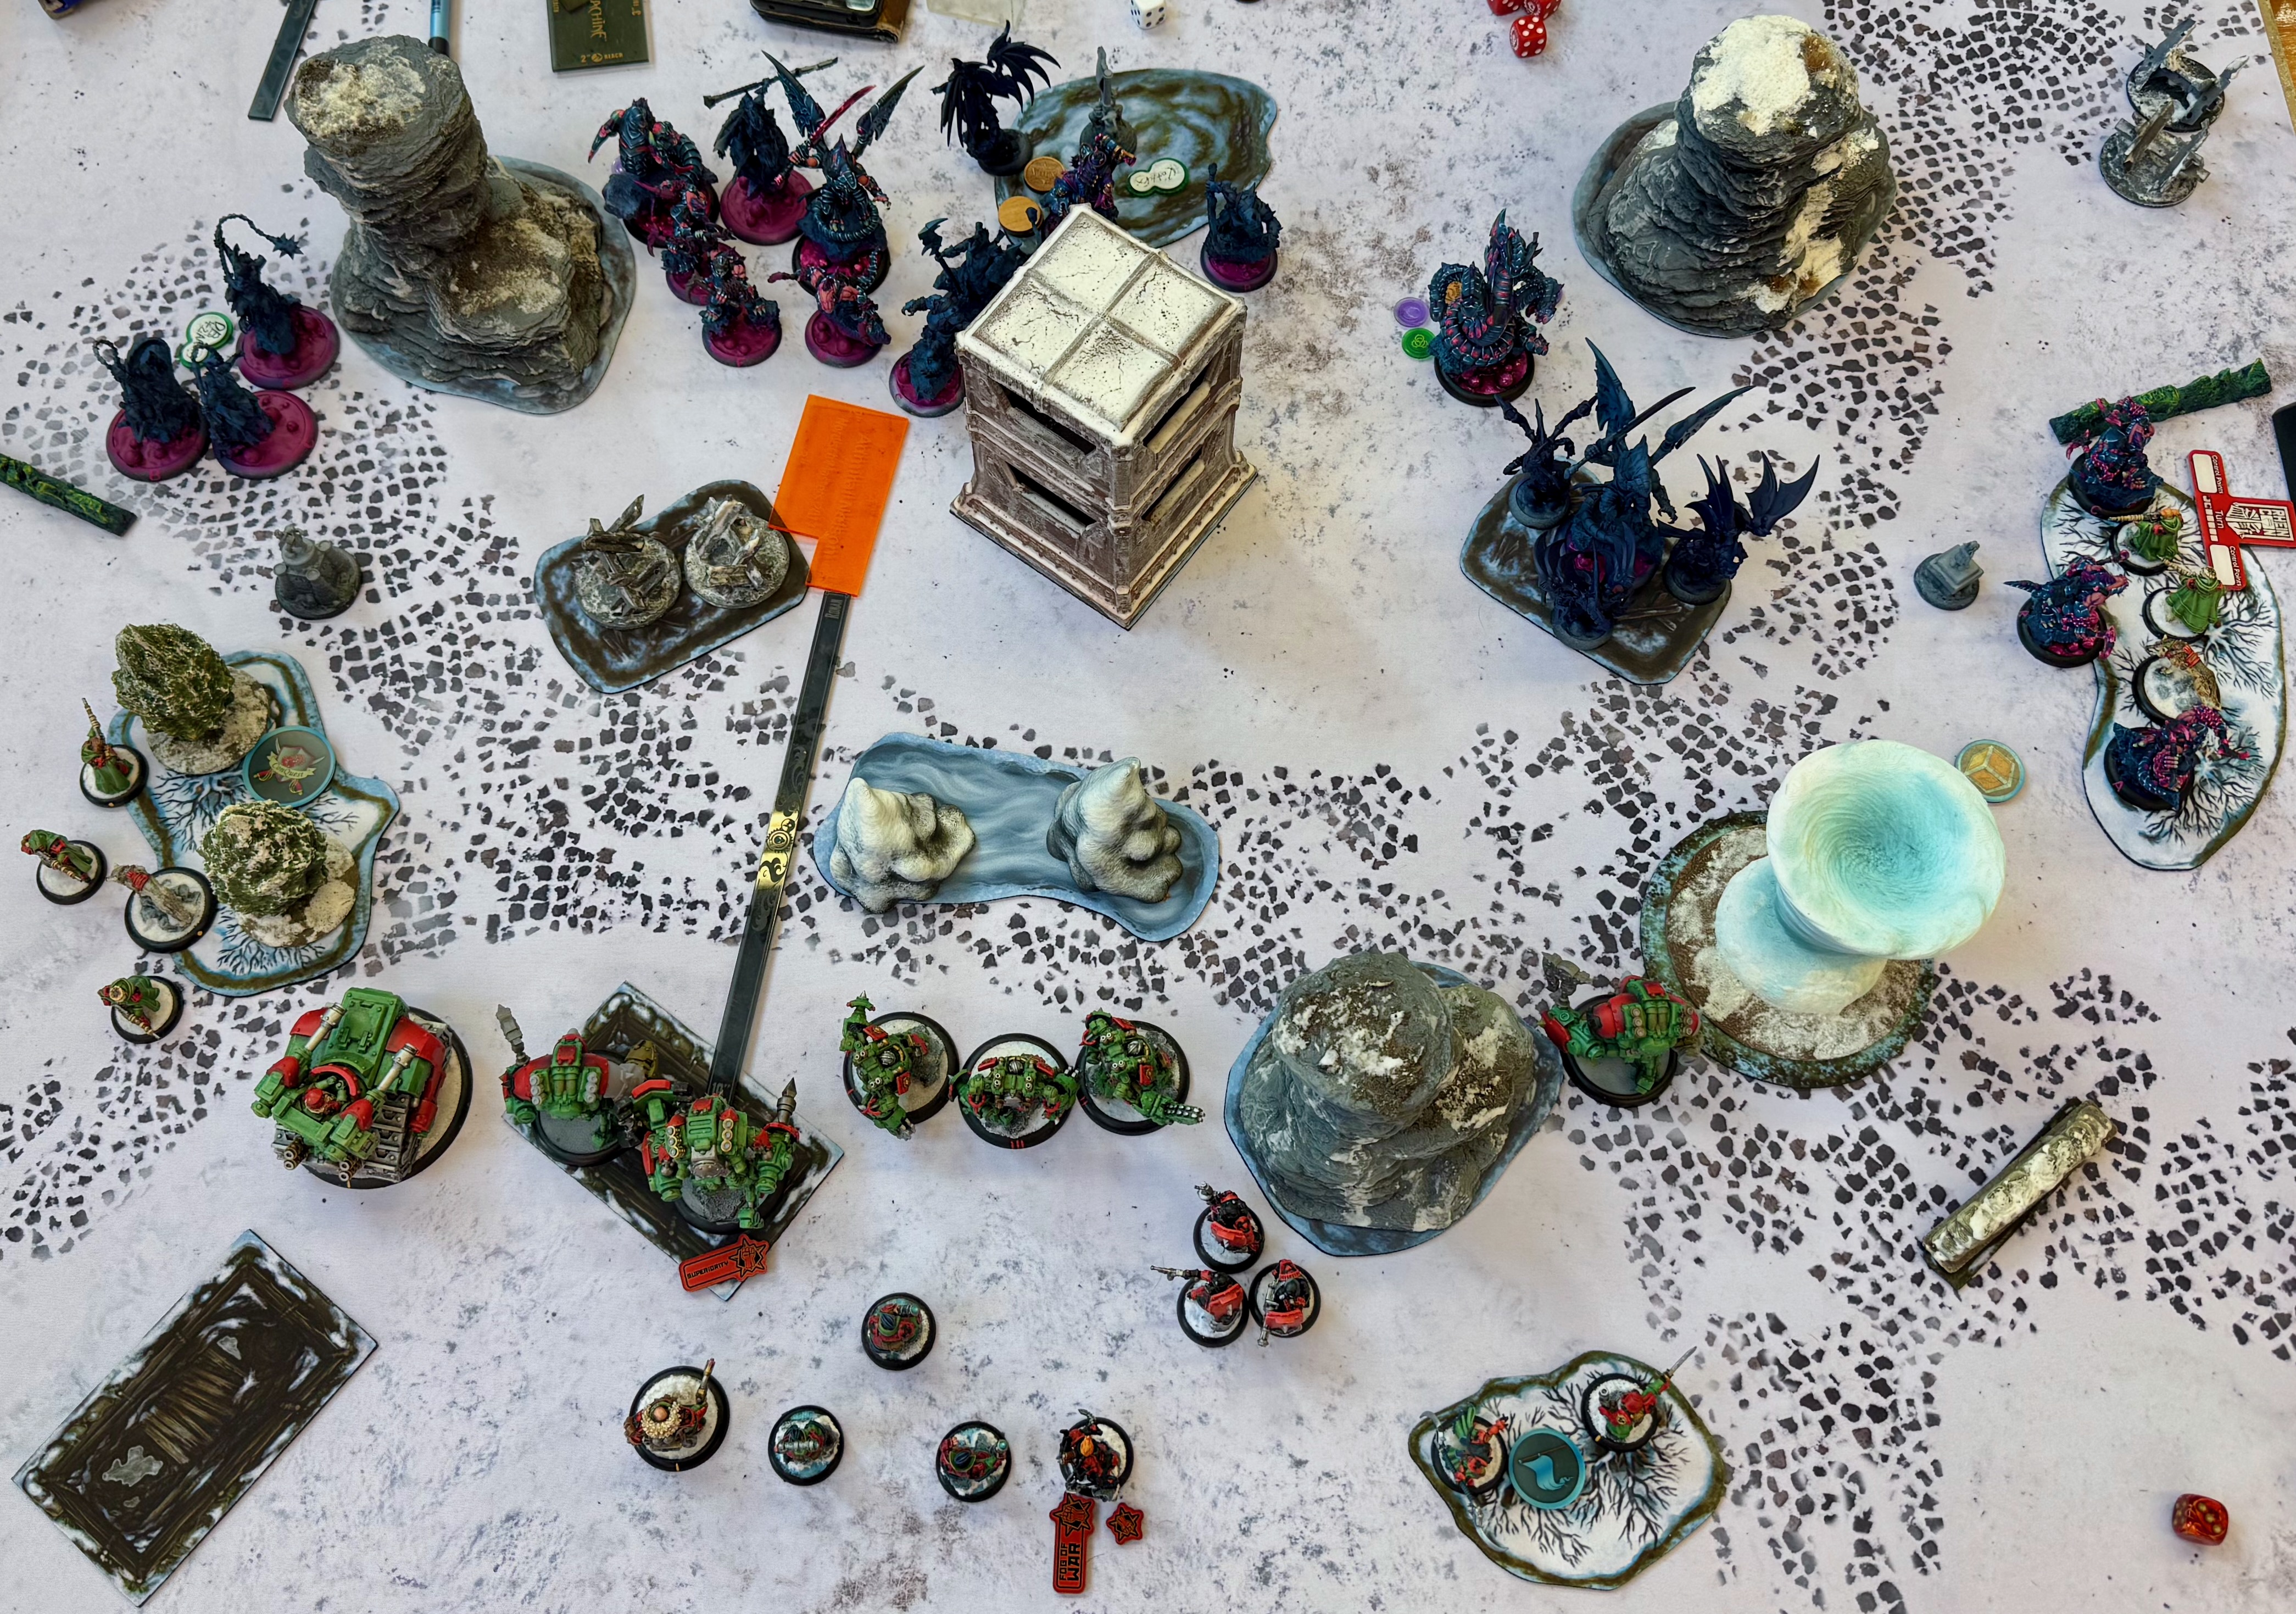
The game is Two Fronts. That is two 50 mm objectives (cohort, battle engine and leader) across from each other on one flank; two 40 mm objectives (unit and leader) across each other on the opposite flank; and a flag (two models) in the middle. Valerii wins the dice roll and deceides to go first.
The Marauders deploy two beasts on the right side of the board, near the 50 mm objective. Also, a unit of Marauders join them, and I think a Fugue Walker. On the opposite of the board, the last two Marauder units deploy. Every else goes in the middle along with the Warlock. The Fire Guardians near their 40 mm and 50 mm objective.
Valerii deploys the Kontroller Module on the right flank to deal with the 50 mm objective. The Snipers advance deploy on the left to put some pressure on the 40 mm objectives. The middle is deployed according to doctrine.
 |
| End of deployment |
The picture above shows the board after deployment. We shake hands and kicks off into round 1.
Round 1
The exiting round begins with Valerii advancing everything. There isn’t anything to be scared of yet. So, it is full steam ahead to grab as much board as possible and put the pressure on the opponent. As always, he drops Superiority on one of the Avalanches, Escort on himself, and Puissance on the Wrecking Crew.
My opponent is on to the Avalanches. So, despite this round also being full steam (or whatever beast run on) ahead, it is with an eye on the two fast guys. Not to mention a certain respect for the Suppressors as well.
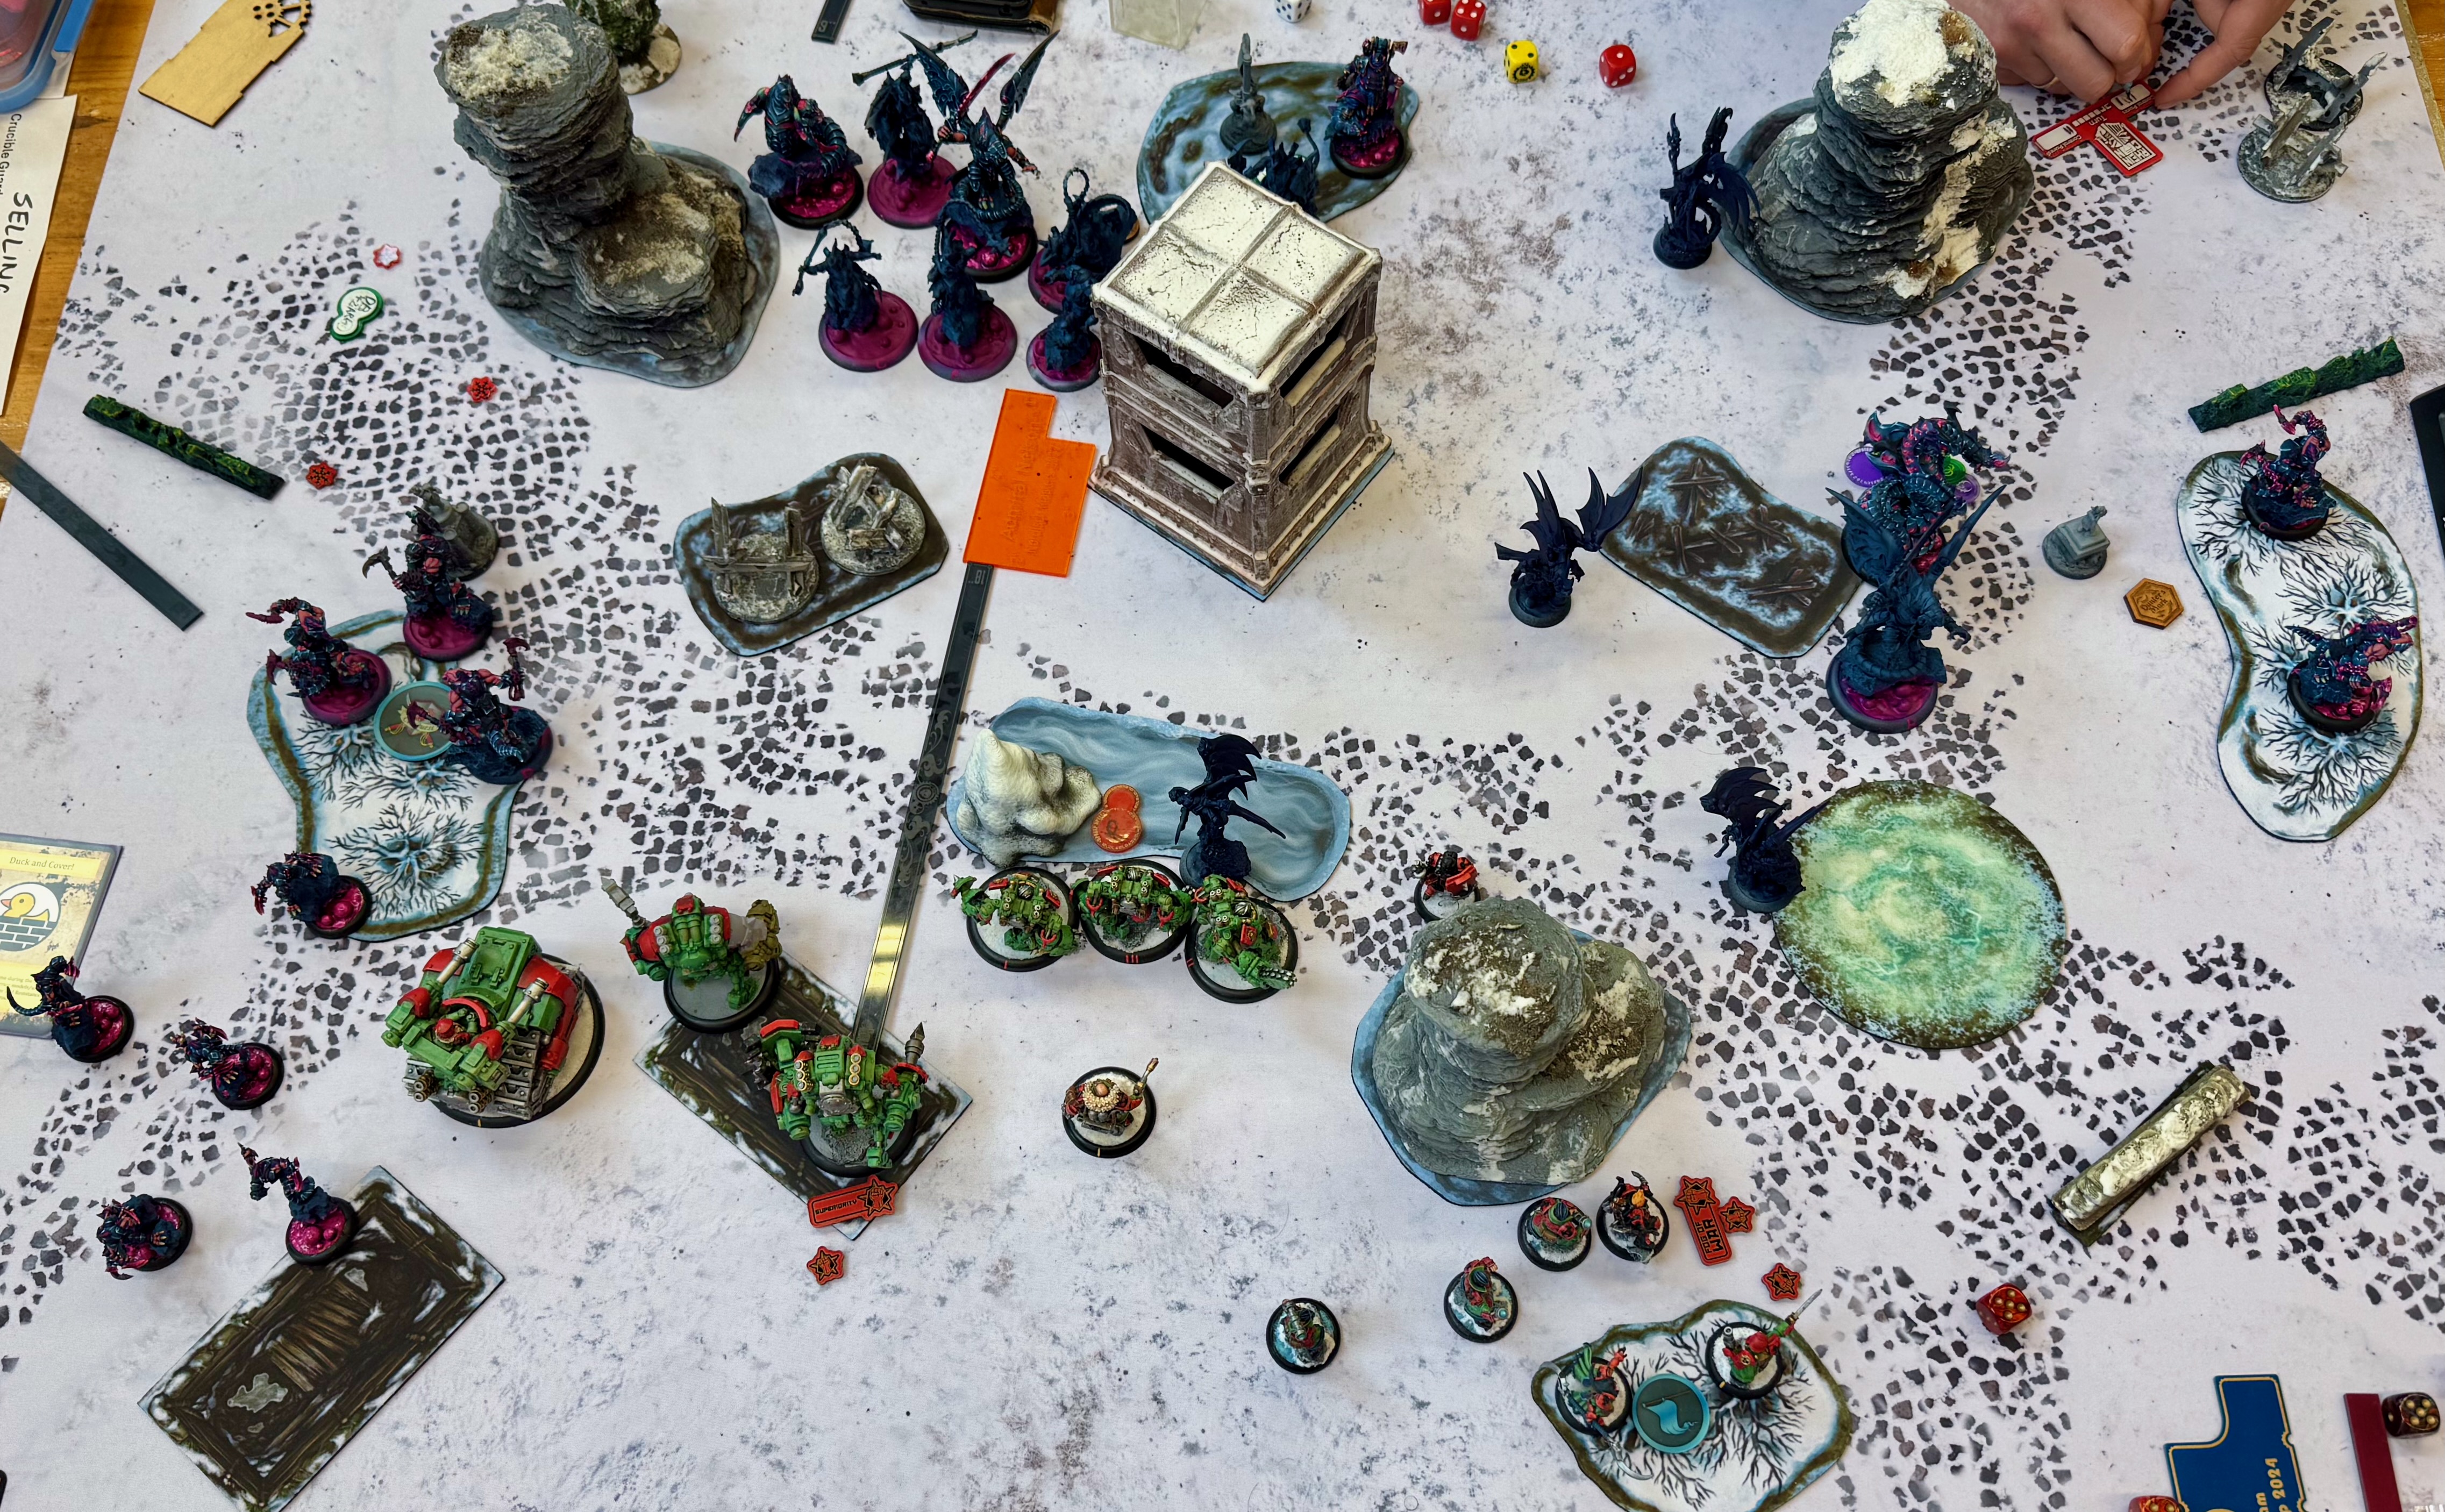
On the left flank, all the Marauders moves forwards and to the left, mostly staying behind the cloud. On the right flank, stuff clumps up around the Great Old One, along with the Admiral. The middle is almost empty with the brothers behind the Vorogger.
The Admiral puts Fortify (+2 ARM) on the Vorogger and Storm Rager (+2 MAT, ARM and melee damage) on the Fugue Walker to the left. Rough Seas (roll three die on ranged attacks, remove the highest) also goes up. And something else I forgot.
 |
| End of round 1 |
The picture above shows the situation at the end of the shuffling round before everything properly starts. Let the second round commence.
Round 2
Now the action can begin. Valerii is attempting to get some shooting done. However, Storm Rager is kind of messing up the plan. I know Marauders can somehow go from not hurting a fly on paper, to kill everything (I have still not understand the mechanism. It must be magic), I'm taking the chance and positioning them to take the alpha. This might be a mistake.
On the left flank, I manage to get rid of on of the pesky Fire Guardians and remove some Marauders. Not too impressive. The two Avalanches position to be a threat in the next round. Either against the two heavies or perhaps against the Admiral herself.
On the right flank, the Dire Wolf attempts to position to score the home objective and contest the enemy objective. However, after quite a lot of converting inches to millimeter (why not just one type of units?) and chatting to the nice judge, it turns out that a 50 mm (or 1.96850394 inch, if you prefer) is too small to do that.
Let's do the maths:
- The board is 4 feet = 48"
- The 50 mm, or 1.96850394" objective is 18" in. So the front of the objective will be at 19.96850394".
- This is also true for the other objective.
- This leaves 8.06299212" between the two objectives.
- You have to be within 3" to either score or contest. That leaves a required base size of 2.06299212".
- A 50 mm base is 1.96850394".
- That means we are missing 0.09448818".
- or ~2.4 mm in sensible units.
- Thus, a 50 mm base cannot score and contest both 50 mm objectives in Two Fronts.
Anyway, in the middle, the Suppressors prepare to receive the alpha with the Wrecking Crew behind to retaliate. The Avalanche prepares to threat something. Valerii hangs back. The picture below shows the end of Valerii's turn
 |
| End of turn 1 |
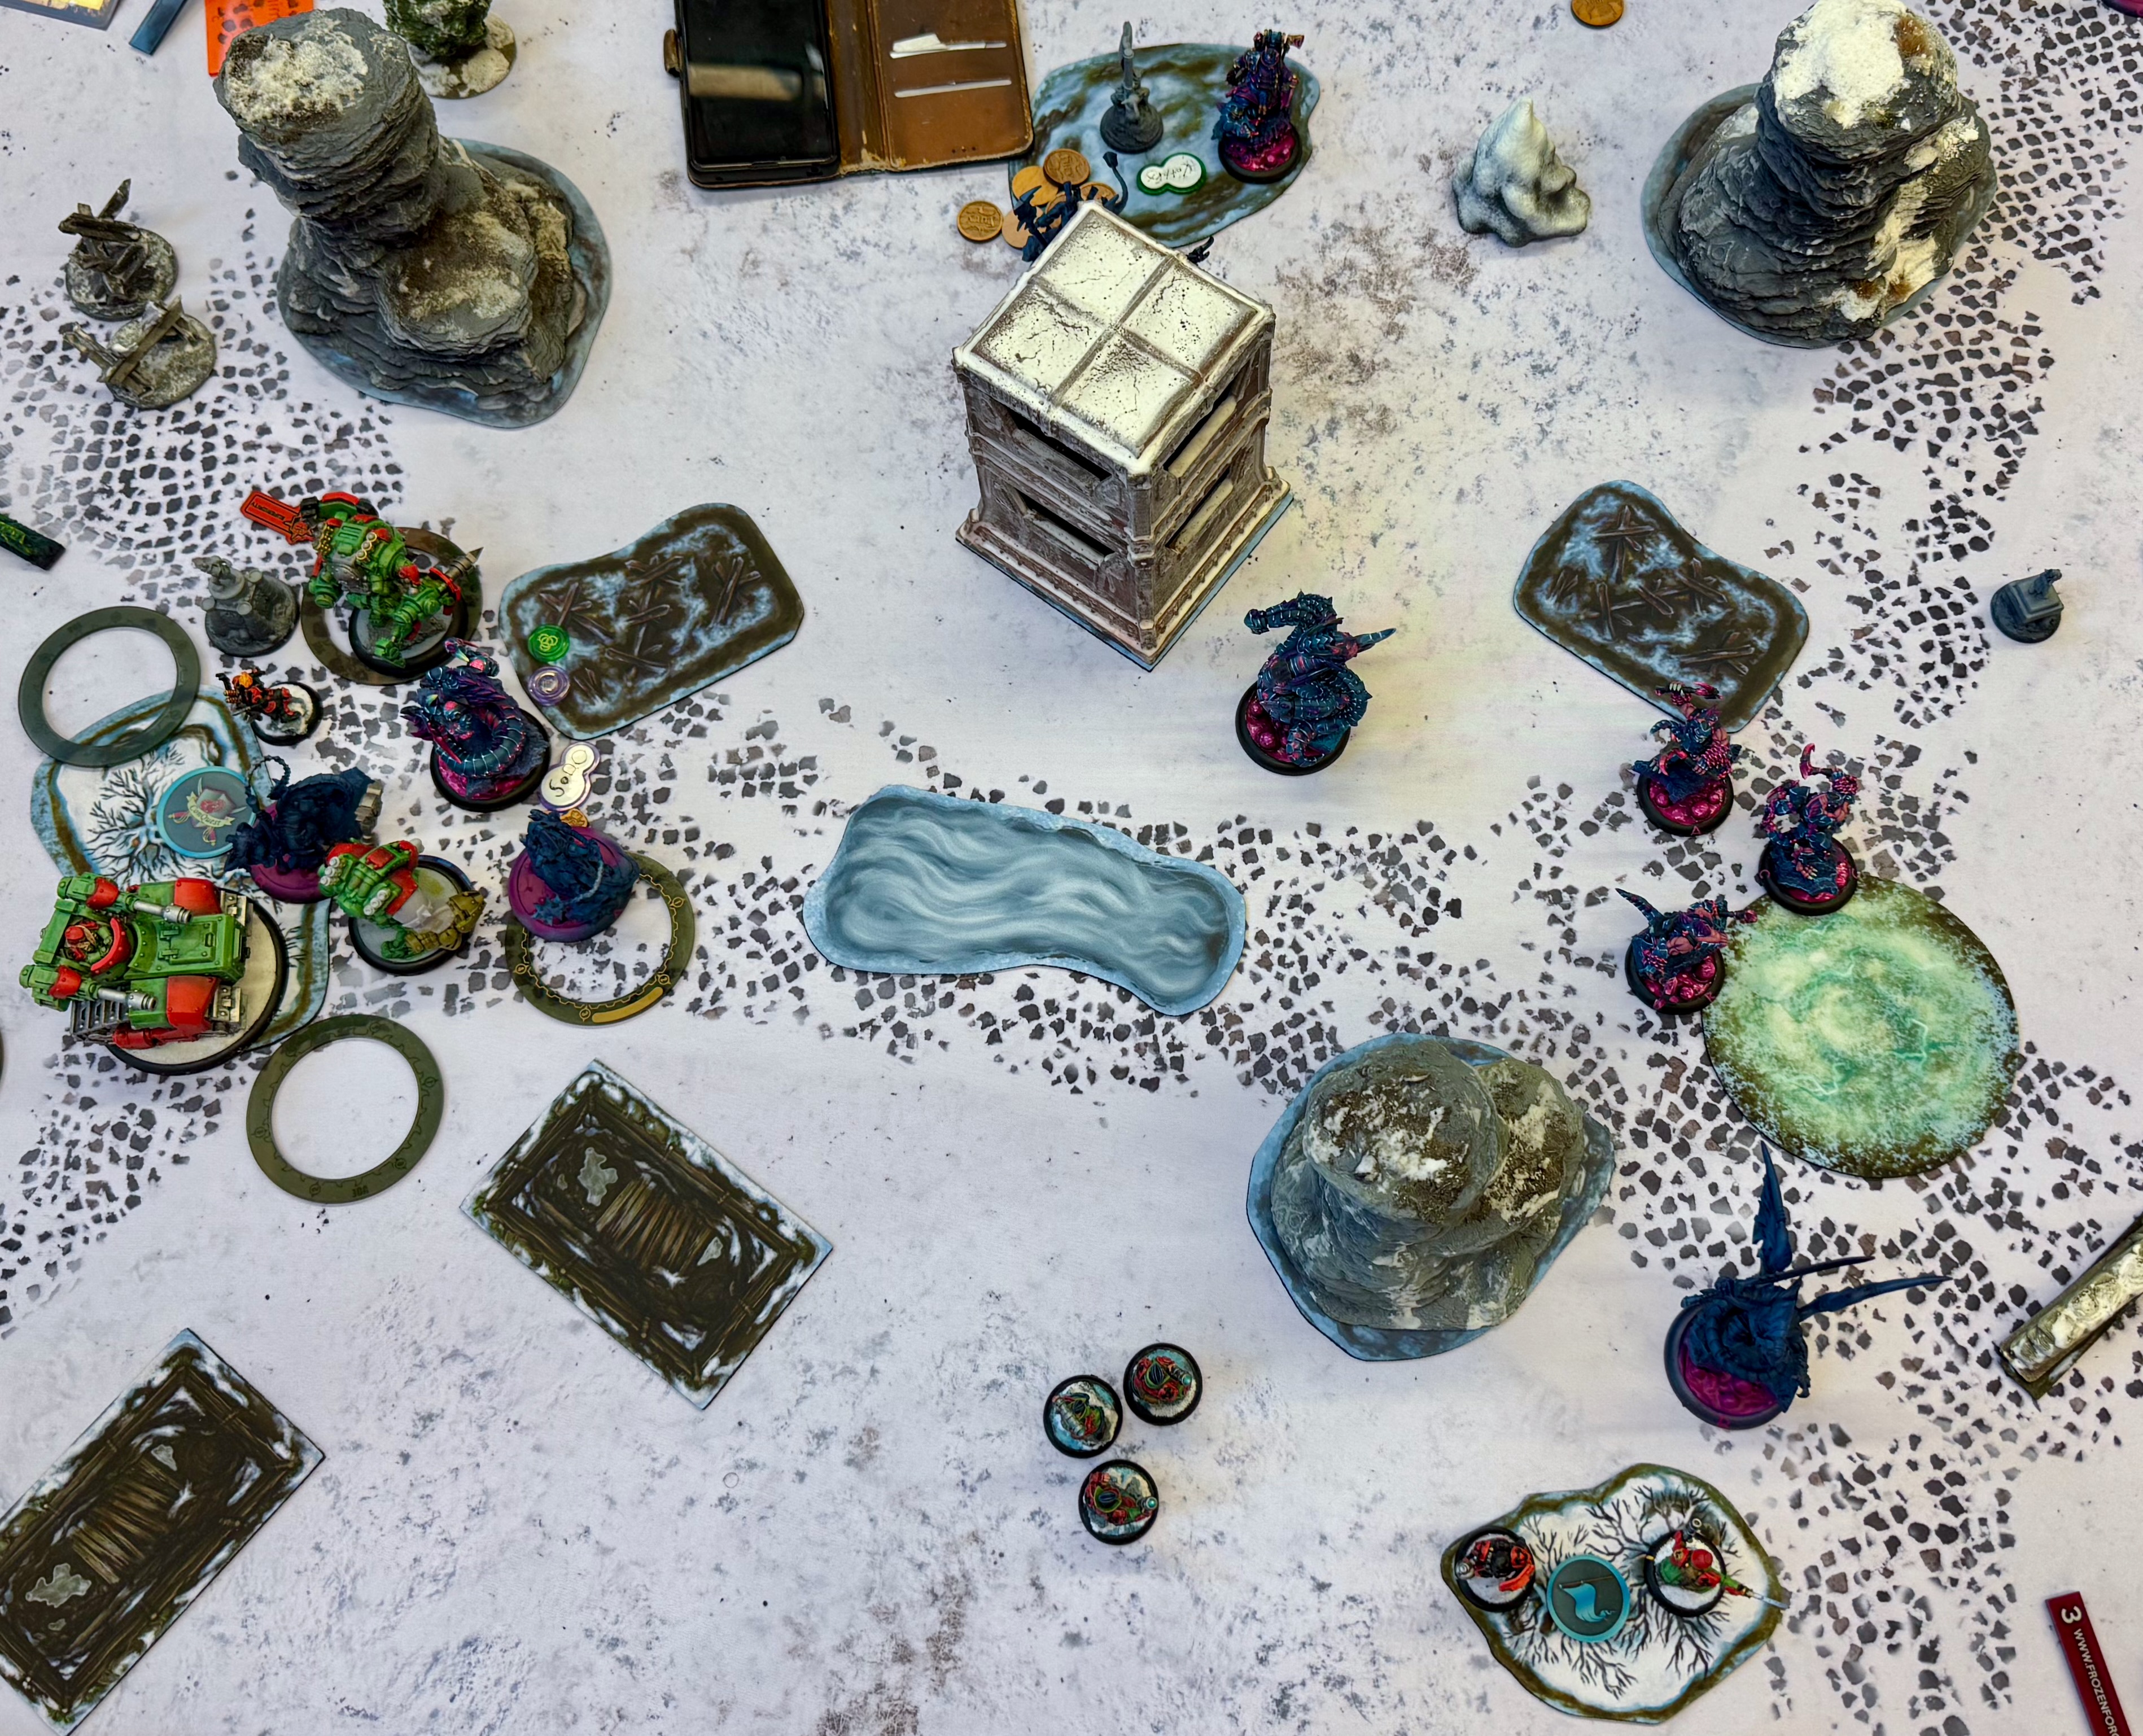
The drunken troll pirates strike back. The Admiral readies her forces and feats (+2 DEF and Rapid Healing inside her 14" control). On the right flank, the Great Old One walks up and trivially eats the Dire Wolf (the one on the 1.96850494" base). A Fugue Walker kills the Mechanik. Marauders clean out the Suppressors
On the left flank, more Maraduers pile in. They kill the Snipers, but only one of the Suppressors. In the middle, more Marauders join the frey, along with the three brothers. Two Suppressors and two Wrecking Crew go down. The Vorogger rush through the forrest to be an annoyance. The picture below shows the result of Marauder Mayhem. Scenario score is 3-0 in the drunk trolls favour.
 |
| End of round 2 |
OK! So, that was rough. I did the major error I often do, in particular during my first game in a tournament. I overextended the army and over estimated their resilience. I was actually thinking that during the first round. I get existed and was stuff to happen. As so often, stuff did happen. Let's see if there is anyway of getting back from this?
Round 3
It is not completely lost yet. There is always an assassination probability where there are two Avalanches on the table. However, that is for all practical purposes zero in this round. So, a bit of cleaning up perhaps.
On the left flank, the two remaining Suppressors in concert with an Avalanche cleans up a bit in the horde of Marauders. Should be sufficient to score my 40 mm and contest the other one. On the right flank, the Kontroller has to contest the opponent's objective, whilst a Mechanik and an Officer contest my objective.
In the middle, attempts are made to hurt the Vorogger. That turns out to be next to impossible. It has ARM 18 (base 16 + Fortify), Impervious Flesh, and is under Storm Rager. It is like hitting a rock. Despite Valerii feating for a few Kill Orders. Nothing really happens.
That is basically is. I made a single scenario point, so I'm still in the game. The picture below shoes the lack of result.
 |
| End of Valerii's turn |
I have basically lost. So, I'm arguing for an assassination. I'm taunting the Vorogger a lot to get it to assassinate Valerii. It is surprisingly difficult to goat a German into anything. But af some name calling and referring to a specific breed of birds, I'm successful. The Vorogger deceides to assassinate Valerii.
Before the assassination run the Pygs on the left flank advance to contest the objective. On the right flank, models are removed so both objectives can be scored. The the Vorogger stares down Valerii.
A Vorogger might be very difficult to kill, but that is nothing compare to how bad it is at killing stuff. Six attacks are made. Valerii is still standing. The Brothers are called into help. Only two of them can reach Valerii. They do an impressive amount of damage. Yet, he remains standing. This does obviously not put an end to the taunting. However, flipping the clock does. I loose on scenario. The picture below shows the loss of Valerii.
 |
| End of game |
I lost. Not a huge surprise. My opponent was clearly a superior player. Also, I did my usually mistake in my first game. I rush the enemy hoping to get into the action fast. Khador simply does not survive an alpha. It should play better tactical.
Nevertheless, we had a lot of fun and my opponent was lovely.
Battle 2 — Storm Legion
Next up is Storm Legion under Caine 4. I have always found Storm Legion quite boring to play against. I can't put my finger on why. They just are. Luckily, the Polish player is a very nice guy and have made some really cool tokens.
Despite having had the best Januar update in the history of the game, it is Caine 4 staring at me. He is quite difficult to get rid of and they tend to shoot a lot. We are playing Tench Warfare, which is kind of fitting thinking about the next Cygnar army. It is a bit of a odd Caine list, but just a bit. The list is as follows.
| Cygnar - Storm Legion Major Allistr Caine - Arcane Shield - Calamity - Deflection - Heightened Reflexes - Teleport - Courser - Storm Thrower - Voltaic Punching Spike - Courser - Storm Thrower - Voltaic Punching Spike - Courser - Storm Thrower - Voltaic Punching Spike - Courser - Storm Thrower - Voltaic Punching Spike Legionnaire Officer Lieutenant Sara Brisbane - Deuce Zephyr Arcane Mechanics Storm Lance Legionnaires Storm Lance Legionnaires Storm Vanes Black 13 Command Cards - Careful Reconnaissance - Defenses - Barrier - Barrier - Barrier - Hit & Run - Lucky Penny - Sapper Total Points 100/100 |
I should probably play Zahara for the wild assassination run; she will trivially take out Caine if she can get there. However, with all the electric leaping going on, I'm opting for Valerii. More Armour, the Kontroller Module for handling one of the 50 mm objectives, and Avalanches to threat Caine.
Deployment
We are playing Trench Warfare. Caine wins the roll of and decides to go first. He deploys a unit of cavalry on each flank. The Zephyr in the middle with Caine and the Coursers scattered across the line. Brisbane and Deuce go to the left and the Black 13 Advance Deploy in front of them.
 |
| End of deployment |
Valerii deploys the Kontrolle Module to the left to focus on the enemy 50 mm. A unit of Suppressors tag along eyeing the cavalry. On the far right, the unit of Snipers deploy. Most other stuff goes in the middle, with a slight overweight to the right flank for working the friendly 50 mm objective.
The deployment is shown in the picture above. Onwards to the first round.
Round 1
In general, Cygnar's first turn is a bit cautious. The cavalry advances, but stays hidden behind buildings or woods to avoid the hail of lead the Suppressors are preparing. Most other stuff advance in the middle to stay behind the Barriers. The Zephyr hangs back.
Valerii does his usual thing. Escort goes up, Superiority on one of the Avalanches, Puissance on the Wrecking Crew along with At All Cost. On the right flank, the Snipes run up behind to house, trying to stay away from any lightning. On the left flank, the Suppressors move up behind the woods, avoiding the cavalry. The middle shuffles forward, attempting to stay of out charge range; shooting range is unavoidable when playing Cygnar.
The picture below depicts the situation before the lightning storm breaks out.
 |
| End of round 1 |
This is the situation. Let's see how much pain Cygnar can bring when engagement begins.
Round 2
Cain starts by ordering Deuce and a Courser to move in and spray, and shoot the Suppressors on the left flank. I now notice that I manage to line them up perfectly for spraying. The combination of Powerfull Attack and Reload makes Deuce a brute. What remains in the smouldering pile of slag is taken care of by the Black 13. No more Suppressors. The cavalry moves a bit forward, but stays behind the woods.
On the right flank, the cavalry moves around the house and remove the Snipers and dog. Everything else stay nice and cozy behind the Barriers.
Revenge is best served cold. So, the Kontroller moves up and attempts to spray the two 'jacks on the left. It doesn't really work. Yet, the Dire Wolf charges. It is a bit risky, yet I'm aiming to put a lot of heavy around into the Cygnar line to give them something to deal with. Both 'jacks survive.
On the right flank, the Avalanche moves up and kills a guys on a horse. The second Avalanche is fules up, and after removing the Barrier in front of Cain slams it way there. It does manage to get a single attack to land in the face of the gun mage, which is not enough. But enough for Cain to think about getting a new pair of pants. The Wrecking Crew follows suit and one of them connects with the Zephyr. Everybody else moves forward.
The picture below shows the situation after Valerii's big advance.
 |
| End of round 2 |
This is my plan. Put a lot of heavy armour into the front line of the enemy. I just hope that it is difficult to deal with. I do hear a lot about Khador's huge armour — I'm usually disappointed.
Round 3
Cain feats. On the left flank, the cavalry moves to my flag and kills the Kontroller. The Officer stands strong. On the right flank, the other cavalry unit attempts to take out the Avalanche, without any luck. All the action is in the middle.
Through some clever order of activation, Cain mange to basically remove everything. An ARM 22 Avalanche evaporates, an ARM 21 Dire Wolf disappears faster that you can say Powerfull Attack, the wrecking crew melts in front of a Zephyr and Courser, Sergei falls to the Zephyr. ARM 20 base doesn't really do it when the DEF is like an immovable object. I was hoping for less.
Not all is lost, just most of it. There is a chance that I could pull out an Avalanche rabbit again. That is why I have two. The last Avalanche moves around the corner of the house, attempting to take out the Course and line up for slamming into the lines the next round. It does not kill the Courser. The Mechanik moves into the way between the cavalry and the Avalanche. The Suppressors move to the objective to score and attempts to shoot another Courser. Not a lot of luck here either. The Officer to the left moves into the terrain to at least contest for one round.
That is it. The picture below shoes the sorry remains. Scenario score is 6-4 in Cain's favour.
 |
| End of round 3 |
As predicted, I got disappointed. ARM 20 doesn't really cut it when DEF is like a welded shut door. It was a gamble that did not payoff. Let's see how horrible round 4 can be. On the bright side I can't loose that many more models.
Round 4
Cain and his troops being on the right flank. I'm a bit unsure how it happed, but the cavalry somehow got past the Mechanik or he got killed. Either way, the two Storm Lancers arrive next to the Avalanche. That is not good news. With a bit of help from a fully fuelled Courser, it goes down. Deuce and the Zephyr easily remove the last unit of Suppressors. Finally, the cavalry on the left flank kills the valiant Officer.
Game is done. I loose on scenario 10-5. The picture below shows the sorry state of play.
 |
| End of game |
Hard match, nice opponent. I still find Storm Legion pretty boring to face. I think it has to do with all the: "This thing can do this", "OK, not too bad", "But if this guy is near, and this other one does this, and oh, by the way my weapon has this special ability", "Ok, that is bad". I'm reminded why I loved Butcher 1's card. Not extra rules! I'm old, I dose off from all the rule interactions...
Anyway, onwards to the next battle.
Battle 3 — Shadowflame Shard
Next up is Shadowflame Shard. Traditionally, this can go either way. As long as I don't get hit by them, it's ok.
It is Kyrrax staring at me from the other side of the table. I haven't played that one before. I'm told it is kind of like Shadowflame's Butcher. There is the usual twin Paragons to mess up shooting. Skylla is manageable. I donøt like Incarnate Knights. They seem to always be better on the tabel than their rules dictate. The list is a follows.
| Khymaera - Shadowflame Shard Kyrrax, the Unrelenting Night - Skylla, The Abyssal Fury [16] - Vypex [13] - HEAD - Viper - TAIL - Hunter's Mark - ARMS - Cleavers Bellighul, Master of Pain [4] Pythia [3] Ryvyn, the Onyx Rampant [6] Wraithwing Paragon [5] Wraithwing Paragon [5] Incarnate Knights [11] Quick Fang Stalkers [7] Shades [9] Talon Death Dealers [7] Talon Lashers [7] Talon Lashers [7] Command Cards - Blessing of the Gods - Defenses - Barrier - Barrier - Brrrier - Duck and Cover! - Lucky Penny - Put the Fires Out Total Points 100/100 |
I think this will be a job for Zahara. Her list is not relaying so much on shooting, and her massive charge range might take Kyrrax by surprise. That was at least the thinking untill my lovely opponet says: "There are so many Khador players in my meta, so I know exactly what all of you models do. No need to explain.". This is my second or third game with Zahara. So, there is a high risk of my opponent knowing my list better than I do.
Anyway, we are playing Best Laid Plans. My opponent wins the roll-off and decides to go first. I pick sides. The two sides are quite alike. The opposite side has the obstacle more in the middle and two on both sides, forcing the enemy to gather between them. This might be an advantage, or not. Let's see.
Deployment
The game is Best Laid Plans. There are two 50 mm objectives (cohort, battle engine, and leader) in the middle of the board. 40 mm objectives (unit and leaders) to the left, two cashes on the right, and two flags behind their corresponding 50 mm objectives.
As projected, the Khymaera player makes almost a brick in the middle. Kyrrax in the middle, and Lashers on each flank. Besides that, the deployment is infantry heavy to the left, which is no surprise as that is where the 40 mm objectives are. Finally, the Shades advance deploy in the middle.
 |
| End of deployment |
Zahara deploys her troops in a slightly different manner that before. According to imperial standards, a unit of Snipers go on each flank. One of the Great Bears go to the right to mess with the cashes and the 50 mm. Heavy deployment to the left with both Avalanches and the Bison, supported by the Wrecking Crew. The small figures go in the middle with Zahara.
The picture above shows the situation after deployment, and just before everything kicks off.
Round 1
First round is as most often quite uneventful. Kyrrax moves everything forward in a nice brick, except for the Quick Fang Stalkers who wish to ambush.
 |
| End of round 1 |
Zahara orders both the Snipers to move far ahead. Lorenzo moves into the cloud to get Stealth. Volkova and an Offices moves into the scenario terrain to be ready to score. Everybody else shuffles forward, staying outside charge ranges. The Wrecking Crew moves in front of Zahara to keep her safe.
I forgot to take a picture after the first turn. So, the picture above shows the end of the first round.
Round 2
This is round when stuff normally happen. Let's see what Kyrrax can come up with.
I did manage to over extend the Snipers on the right flank. A unit of Lashers take advantage of that a kill one of them, whilst tying the rest of the unit up. Something kills Lorenzo. I can't remember what. A Paragon and the Shades move into the trench for all the bonuses they can get.
On the left flank, there is a much more cautious advance. The forces gather and even Kyrrax moves a bit to the left. Everybody stays out of Avalanche range.
The picture below shows the end of Kyrrax' turn. Let's see what Zahara can come up with.
 |
| End of turn 1 |
On the right flank, the Great Bear charges the Lashers and only manage to kill one of them. I'm not sure it was the smartest move. But I think I had a plan. The Hounds move in front of the big rock, whilst Zahara moves behind it.
On the left flank, models just shuffle around to stay out of charge range. I hoping to force Kyrrax to take the first initiative. The Snipers move into the woods to work as bait. Finally, the Wrecking Crew moves just up behind the cloud.
The picture below shows the end of Zahara's turn.
 |
| End of round 2 |
Now it is getting interessting. We have both be playing rather defensive, except for my right flank. This can not go on forever. On to round 3.
Round 3
This is probably the round where something hits the proverbial fan. Let's see what Kyrrax can throw at Zhara's fan.
On the right flank, a clean up takes place after I overextended. The Great Bear is trivially removed. I also learn that the Shades have Fortune Hunter (additional die on attack and damage rolls against character models). The Hounds also learns this. One is left alive.
On the left flank, the Stalkers arrive from ambush. The Lashers, expectedly removes the Snipers. But, that was the Snipers' job. The Knights move in front of Kyrrax to protect it. That is about it. The left flank was as expected and planned. Whereas, the right flank was poor play from my side.
The picture below depicts the end of Kyrrax' first really violent round.
 |
| End of turn 1 |
Zahara needs to get stuff done. However, the right flank is lost. So she moves to the trench on the left flank. Everybody else tag along.
On the left flank, the Wrecking Crew clears out the Lashers and an Avalanche moves in behind them for a bit of protection and hitting back in the next round. The second Avalanche backs off a bit to stay away from the Knights. Finally, the Bison attempts to do stuff to the Quick Fangs, without a lot of luck.
 |
| End of round 3 |
The picture above shoes the end of round 3. We somehow managed to end at a scenario score of 6-6. I'm not quite sure how. But it is impressive.
Round 4
The right flank is lost to Zahara and Kyrrax can easily exploit that. I'm pretty sure the left flank will be hit with everything.
On the right flank, everything moves towards the left flank. The only ones hanging around are the Shades. They go after Volkova and the Officer. Not surprisingly, Volkova does not survive. The Officer does, though.
On the left flank everything piles in. A Paragon and the Knight clean out the Wrecking Crew, and the Quick Fangs pile in to score the objective. Luckily, the Avalanche survives. Kyrrax itself plays safe and stays behind the house.
The picture below shows the result on the mayheim on the left flank.
 |
| End of turn 1 |
Zahara is in trouble. The left flank is done for and she can't bring herself in a position for an assination run. She needs to pull some sort of furry animal out of some sort of apparel.
She is going to feat, however. I can't remember the exact order of activation. Yet, the combination of her feat, and some killing; the Avalanche and Great Bear in concert; and the Bison; most of the stuff on the right flank goes away. Only two knights are left.
The scenario score is now 10-8 in Kyrrax' favour. So, Zahara is still in the game — barely. The picture below shows the situation at the bottom of 4.
 |
| End of round 4 |
Kyrrax has 11 minutes on the Clock, Zahara 14. So, we have plenty of time. However, it is not going her way. Let's see how Kyrrax ends the game.
Round 5
The Knights charge in a does a bit of damage. However, the main purpose was to make room for the Vypex to charge Zahara. The Vypex dispatches Zahara.
 |
| End of round 5, end of game |
The picture above show the end of Zahara's attempt at facing the Shadowflame Shard. In some way it was OK. Except for over extending on the right flank. Lovely game and opponent. My initial assumption was right: he knew my models better than me.
One more loss under the belt. Onwards to the next game.
Battle 4 — House Kallyss
Last game of today is against House Kallyss. This could be promising as I have a pretty good track record against them. Nice German guy is piloting the dead elves. Very nicely painted model as well. That is always nice. I have good experience running Valerii against the elves; and I just had Zahara killed, so he is the choice.
The Dusk player is playing Morayne, who can be quite some trouble. There are two units of Cavalry, which rarely is a problem when there are Suppressors on the table. The list is a follows (from memory).
| Dusk - House Kallyss Morayne, The Blade of Twilight - Ghast[8] - HEAD - Arc Node - RIGHT ARM - Heavy Blade Fist - LEFT ARM - Battle Shield - Israfyl [17] Dyssiss, the Eye of Darkness [4] Krueger, Wrath of Blighterghast [7] Mage Hunter Commander [4] Mage Hunter Commander [4] Mage Hunter Sniper Team [3] Mage Hunter Sniper Team [3] Void Shaper [2] Dreadguard Archers [9] Dreadguard Cavalry [11] Dreadguard Cavalry [11] Mage Hunter Rangers [7] Seeker Adepts [4] Soulless Blademasters [6] Command Cards - Careful Reconnaissance - Duck and Cover! - Hit & Run - Lucky Penny - Old Faithful Total Points 100/100 |
We are playing Wolves at Our Heels. This is where we are supposed to move the 40 mm objective across the middle line. So, aggressivenes is advised.
Deployment
Finally, I win the roll-off and decides to go first. We need some scenario pressure.
Valerii deploys in accordance with empirical standards. Snipers on the left flank. The Kontroller Module on the right flank. Everything else nicely distributed around Valerii in the middle.
 |
| End of Deployment |
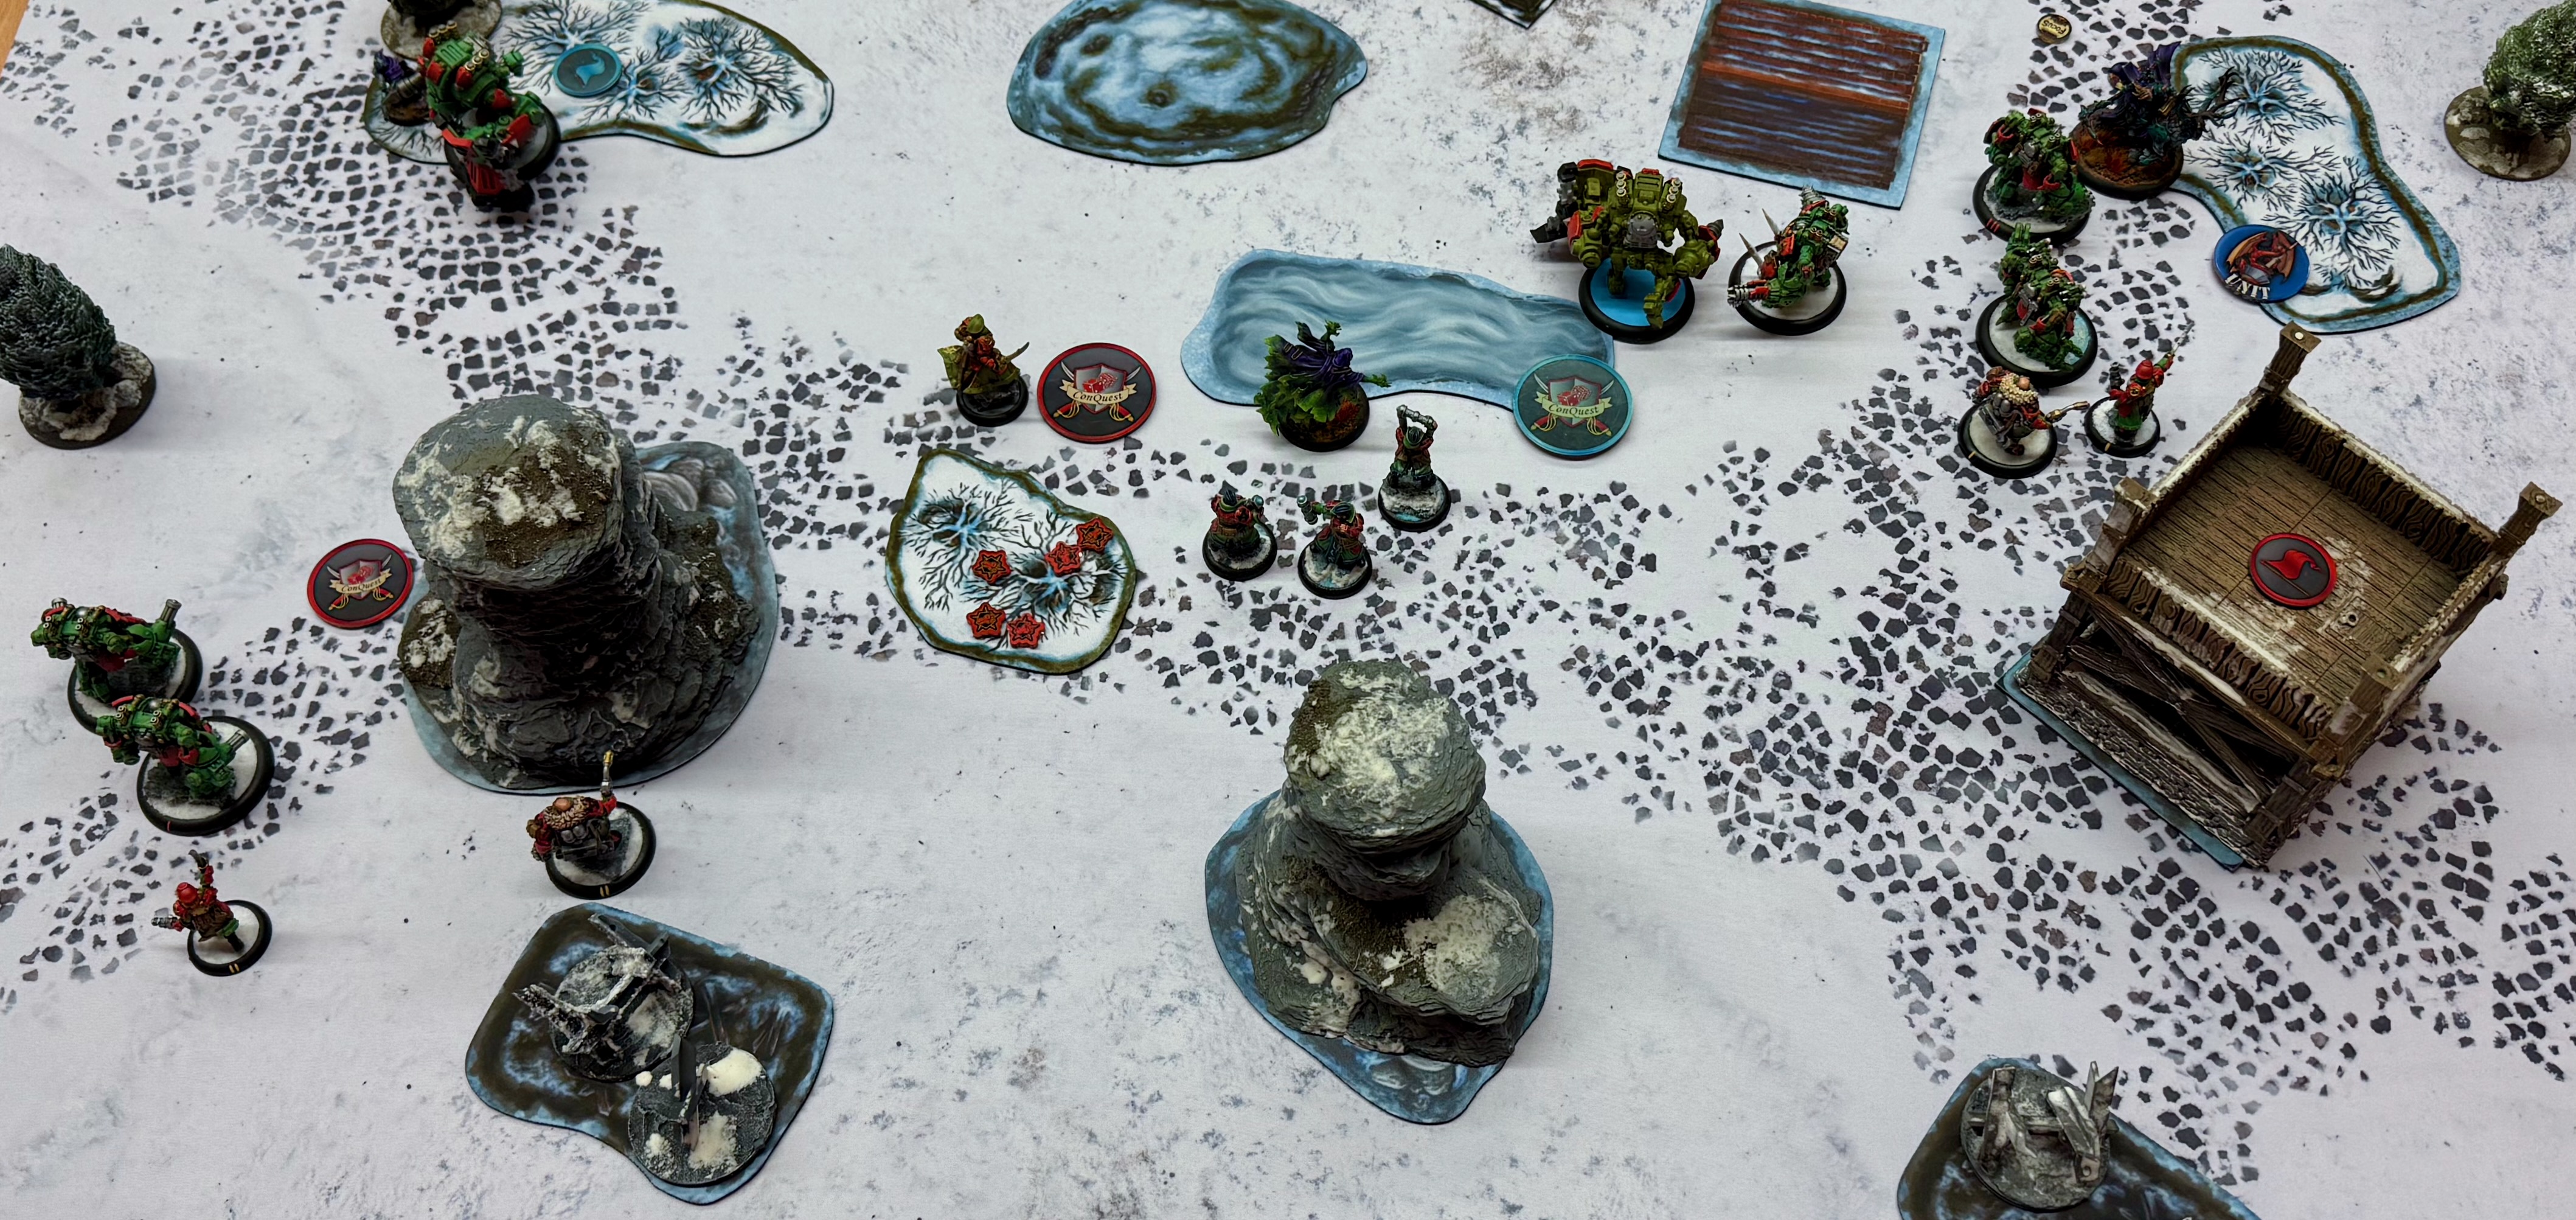
Morayne deploys in a pattern to be expected from dead elves. No straight lines. The Cavalry go on both flanks. Morayne in the middle with all the important stuff around her. The Ghast behind the house, and the Archers on the right flank.
The picture above shows the end of deployment.
Round 1
First round is as always the positioning app or extended deployment, if you prefer. Valerii needs to grab board and be ready to kill some dead elves. Preferably without being charged by them.
He does his standard spell casting sequence: Superiority on an Avalanche, Puissance on the Wrecking Crew, Escort on himself, and the order At All Cost on the Wrecking Crew.
On the left flank the Snipers move up and position around the 40 mm objective. They are probably going to stay there for the entire match. A unit of Suppressors move up behind them ready to control the Dusk cavalry on that flank.
On the right the Kontroller Module moves up along with an Avalance. Same procedure here: a unit of Suppressors move up to control the kittens.
In the middle, everybody else just moves forward. Valerii remains behind the big rock in the middle. It kind of ruins the view. However, probably his safe zone.
The picture below shows the end of The Motherland's first round.
 |
| End of turn 1 |
The elves move forward. On the right they advance cautiously, just up to the objective. They would like to stay out of threat range from the Suppressors. The kittens prey the Suppressors. The Ghast hides behind the house.
On the left, the unit of Rangers move up and clear out gunnes the Snipers. They kill all the Snipers and the dog! I don't like Snap Fire. The kittens move just a bit forward and prey the Suppressors.
On the middle stuff just moves a bit forward and towards the middle. The picture below shows the end of Dusk's first round.
 |
| End of round 1 |
End of round one. Next round the killing can begin (eventhough the Rangers couldn't wait). Let's see what happens.
Round 2
Round two is all about baiting the enemy without giving the too many charge options. So, in the left the Suppressors fill the hole left by the Snipers, heat up their gatlings and wait. On the right, the Suppressors advance, attempting to stay out of charge range of the kittens and also spin up the gatlings.
In the middle, the Wrecking Crew moves up behind the cloud to get close, yet stay out of trouble. The Dire Wolf and his BFF moves towards the 50 mm. An Avalanche does the same for the other 50 mm. Everybody else just shuffles forward.
Valerii thinks he is in control. Scenario pressure is on without being in too much danger. The picture below depicts Valerii's happy moment.
 |
| End of turn 1 |
The initiative is now on Morayne. She is going to use it. On the left flank, the kittens run to the Suppressors and the Blademasters ambush behind them.
On the right flank, it turns out that Morayne has rack'ed Mirage, which enable the kittens to move a bit forward. This brings them in a position to charge the Suppressors, killing two. Nice play from my opponent. Israfyl joins the party and removes the last Suppressor and the Dire Wolf. The later was not in my plan.
Morayne hangs back along with Krueger. The picture below shows the state of play after the elves having been naughty.
 |
| End of round 2 |
That was not in my plan. Loosing the Suppressors is what happens, but also the Dire Wolf was not good. Luckily, the Avalanches have been hanging back for situations exactly like this.
Round 3
It is feat time. Valerii moves up and feats. He goes Precision Strike to make manoeuvring easier, Kill Order on Israfyl and Morayne. He then cast Tides of War to get our of too much trouble. The Avalanche to the left slams Krueger into Morayne, killing him and two Adepts. Morayne is knocked down. It does not follow up to avoid getting out of control. There is not a lot that can threaten it there.
On the left, the Suppressors shoot away on the kittens, managing to kill (only) two of them.
On the right, the second Suppresor can now slam Israfyl into the house and follow up. Somehow it manage to survive but is heavily damaged. The Wrecking Crew can now charge the kittens to the right. They kill the kittens and one of them gets within 3" of the 40 mm objective to contest. Finally, the Kontrolle charge Israyl but does not manage to kill it.
I think Valerii manage to turn the tide. He is quite happy with himself. The picture below shows Valerii having fun.
 |
| End of turn 1 |
Can Morayne recover from the mighthy blow from the Empress' hammer? She can deffinitely try.
Having two ARM 22 Avalanches in the middle of your line is not fun and difficult to deal with when only Israfyl can crack armour. She starts on the left. The Archers charge the Wrecking Crew and kills the one contesting. Israfyl get back in the game but can't really deal with an Avalanche. The second Avalanche needs to be tied up, which becomes a job for Dyssiss.
On the left the remaining kitten and the Blademasters hack away at the Suppressors. They manage to kill one. Finally, the Rangers move into the forreste to score.
The picture below shows the result of attempting to kick back.
 |
| End of round 3 |
So far Valerii is in control. Scenario score is 3-2 in Morayne's favour. Let's see if Valerii has more tricks up his sleaves.
Round 4
It would be nice to clean out the 40 mm objective to the left. The Suppressors attempt but only manage to remove the last kitten and one Blademaster. The Officer must step up, charges and kill another Blademaster. Still one left.
The Avalanche in the middle moves to the woods to contest. Good use of 15 points, I think.
On the right, the Wrecking Crew mop up the Archers. The Avalanche removes Israfyl. Everybody else moves up behind them. Valerii moves into the woods and camps a lot. He really would like to survive this. It is looking good. But, I have often snatched defeat from the jaws of victory.
The picture belows shows Valerii avoiding jaws and having a scenario socre of 5-3 in his favour.
 |
| End of turn 1 |
Morayne is under a lot of pressure. She can basically only drag out the pain and perhaps look for an assassination possibility.
On the right the Ghast finally comes out of hiding to contest the 40 mm objective and kill a single Suppressors. it is joind by Morayne who thinks this is a safe spot. The Void Shaper contests the 50 mm. Dyssiss moves to the other 50 mm.
That is about it. The picture below shows the state of play now.
 |
| End of round 4 |
Scenario score is now 5-4 in Valerii's favour. He has 17 minutes left of the clock. The dead elves have almost 2 minutes. I think Valerii is going to win. Let's see.
Round 5
This is basically a clean up turn. The left flank is cleaned up. The two Rangers are killed by the Avalanche. The other Avalanche cleans up what is around it, and the last of the Wrecking crew plus Sergie remove the Ghast. Unfortunately, Morayne is left alive. Vaelyss becomes a ghost.
The picture below depicts Valerii's de facto victory. The elves only have Morayne and the angry ghost left. With a scenario score of 7-4 in Valerii's favour and only 1:50 left on the clock the game is over.
 |
| End of turn 1, round 5. End of game |
Hurrah! I managed to win one game. I'm so happy. Very nice opponent and a fun game. I should not have lost the Dire Wolf, though. However, a win is a win.
Summary & Lessons Learned
Dear reader, if you made it all the way down here, I'm impressed. I was a long day. Four games is a bit hard. Yet, a lot of fun. As with all Warmachine tournaments everybody were lovely and we had a lot of fun.
I met my goals. I won one! Most of the reason I lost three games is clearly that they are better players than me. On my side, It is clear that I still get to impatient and have not lost faith in the old descrition of Khador as being slow, yet able to take to alpha, and then hit back. It hasn't been true for many years (if ever). Yet, I still think so. More patience is the way to go. Also, I need to know my opponenets bettter.
Anyway, tomorrow is another day with new possibiliets. So, onwards till tomorrow.
For the Motherland!
No comments:
Post a Comment